Disassembly Tutorial | 15 Steps To Tech You Disassemble MacBook Pro At Home
As a supplier of laptop metal casings, we at JXGC are also very interested in computer assembly technology and disassembly issues. Today we are going to discuss a million-dollar topic that everyone is interested in: how to manually disassemble MacBook Pro 13 with Touch Bar at home. Today’s disassembly tutorial is divided into 15 steps to teach you how to disassemble it at home. Hope you find a like-minded person!
Step 1: Confirm Version And Technical Specifications
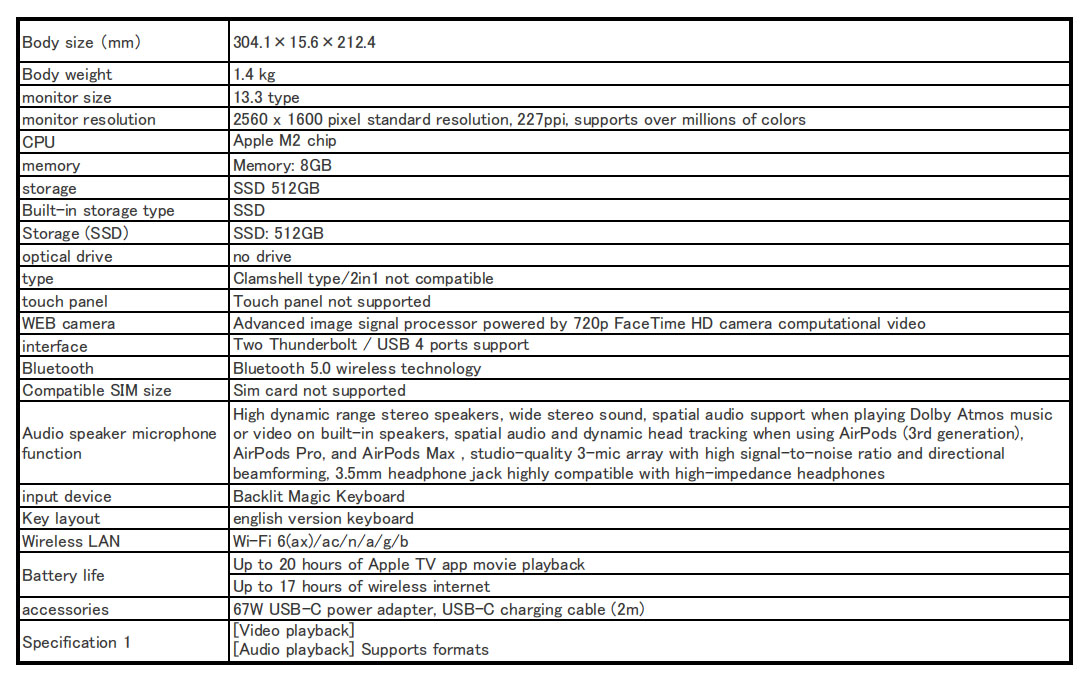
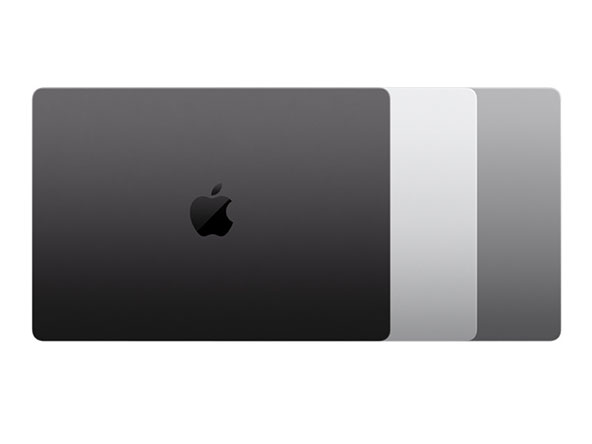
Regarding the version and technical specifications, we refer to the official data provided by Apple. The picture below is a screenshot of Apple’s official chart of MacBook Pro 13 with Touch Bar.
Step 2: Observe The Complete Appearance of The Hand
Apple's laptops are usually industry benchmarks for manufacturing and production. If you look carefully, this MacBook is made of aviation aluminum 7075 , with 200-gauge zircon sandblasting and anodizing.
From the official release information, we can see that the cover is available in three colors: space gray, space black and silver, which has always been in line with Apple's positioning of high-end people. For custom manufacturers of aluminum alloy metal casings, these three colors are also the colors chosen by most electronic consumer products. Of course, this is not all for Chinese manufacturers, as macaron colors and gradients of champagne gold and pink suitable for girls.
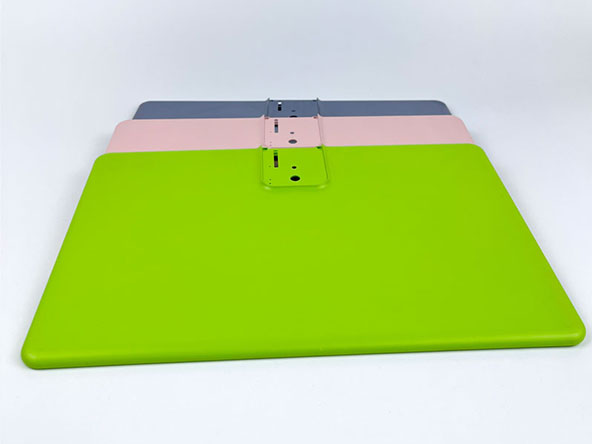
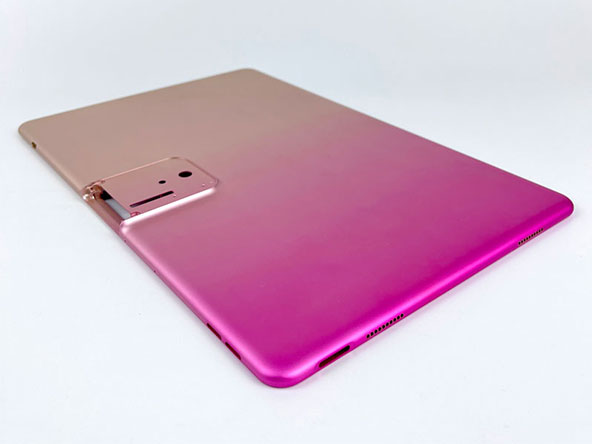
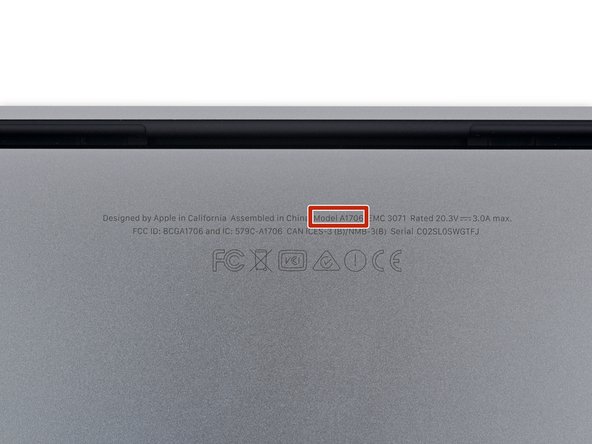
Looking at the metal laser information on the Bottom Case, it is routine to pass FC and CE certifications. This one is a new model: A1706.
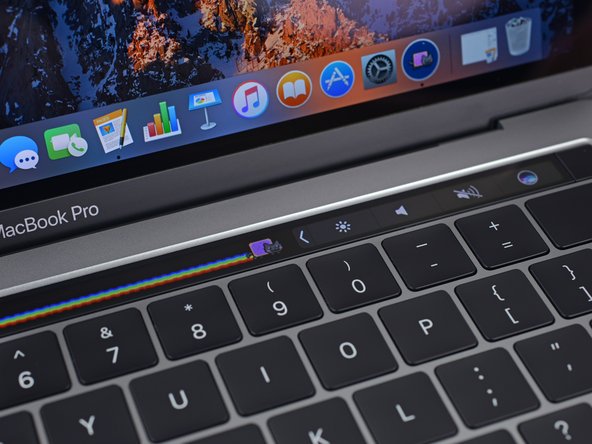
This rainbow touch bar on the keyboard is also very beautiful. With our regular disassembly tools ready, we can start disassembling now.
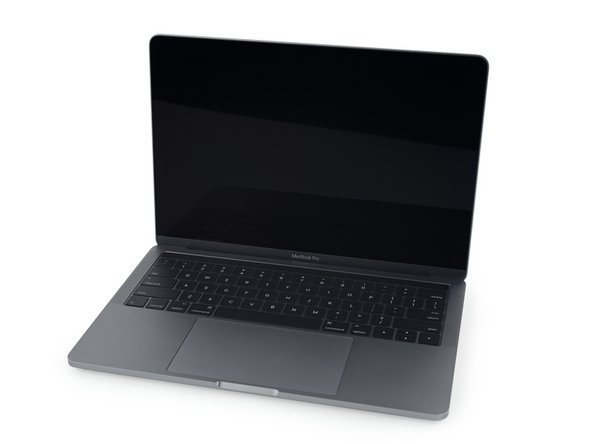
Step 3: Version Comparison Analysis
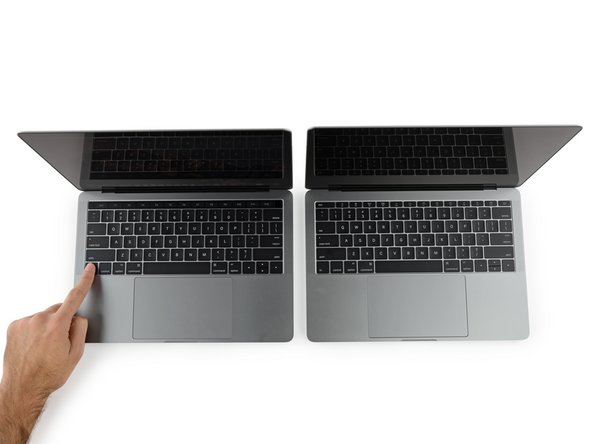
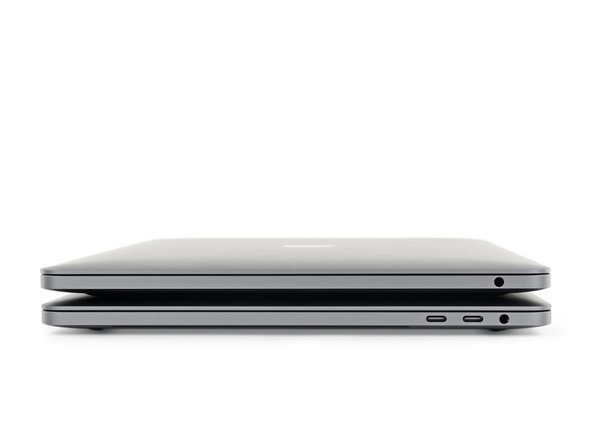
We compared this MacBook Pro 13 with the Jailbroken version. The sizes are the same, but it seems that the function keys inside are missing a bit. One of the more obvious points is that our model is equipped with a touch bar, so there are two additional Thunderbolt ports, and there are two places to connect your dongle or external devices.
Weigh it on an electronic scale and see for comparison, oh, our version with a touch bar is actually 20g lighter than the Jailbroken version, which seems a bit beyond our expectation. Let’s make a bold guess. Maybe it’s because the battery is lighter? have no idea. We look forward to verifying this conjecture after we disassemble!
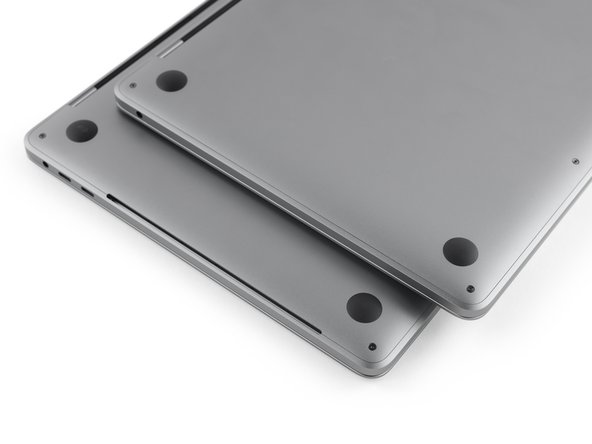
Finally, comparing the Bottom Case, we can see that our touch bar version has a pair of heat dissipation vents on the side. A similar shell structure design is also seen in the Retina MacBook Pro, which is mainly used for Increase heat dissipation and ventilation on the back of the laptop. A very inconspicuous design, but its effect cannot be underestimated!
Step 4: Remove The Bottom Cover and Remove The Touchpad And Headphones
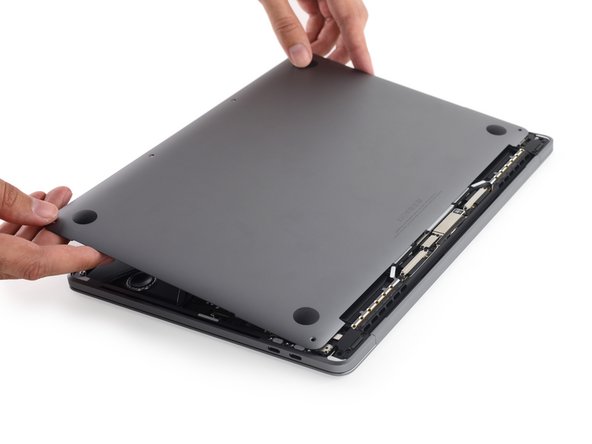
Generally speaking, the bottom cover of Apple laptops uses pentalobe screws. This bottom cover has six pentalobe screws. Then the iconic four rubber bases prevent the aluminum alloy shell from rubbing against the table as much as possible during daily work, thereby maintaining durable performance and a long-term surface that looks new.
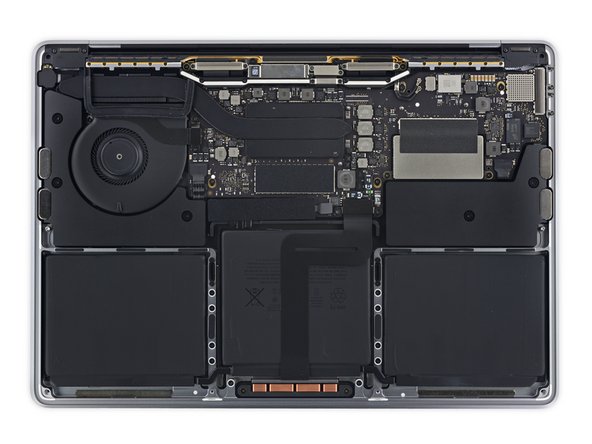
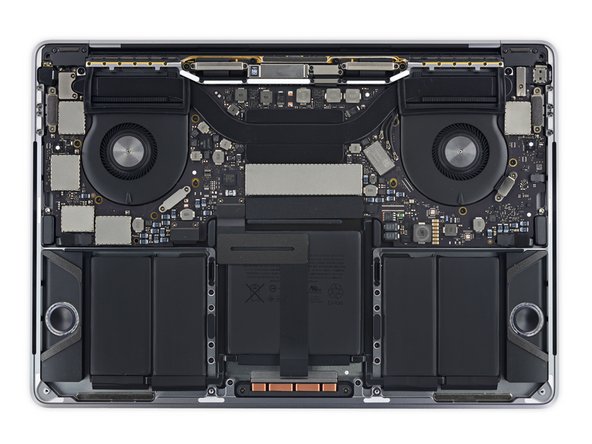
After removing the bottom case, we found that our MacBook Pro 13 with touch bar does indeed use a smaller battery, which is consistent with our guess when we first weighed it. At the same time, we can see two fans and heat dissipation grooves on both sides.
Furthermore, the speakers on both sides are placed lower and there is no SSD card. Due to the addition of function keys to this special touch bar, we wanted to remove the touchpad and headphone jack before taking a look at the logic board!
Step 5: Remove The Battery and Other Connectors
We all know that Apple laptops began to update the battery connection bridge in 2016. This copper gasket is used to connect to the positive and negative terminals of the battery. The connectors of Apple computers are mainly used to connect circuits and hardware. For this reason, you need to be careful when removing the connectors.
Interestingly, we find a lot of water test paper around. If your laptop accidentally gets water, the test paper will turn red.
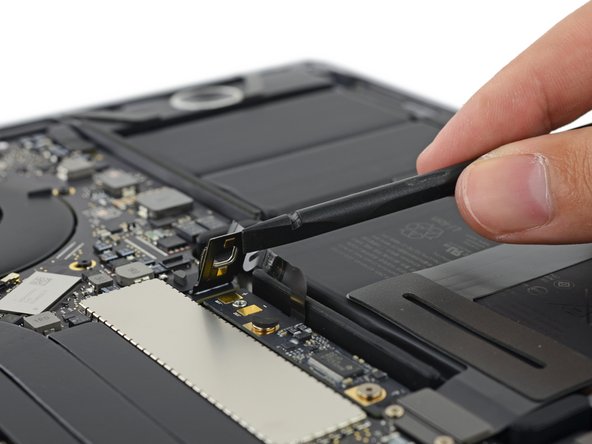
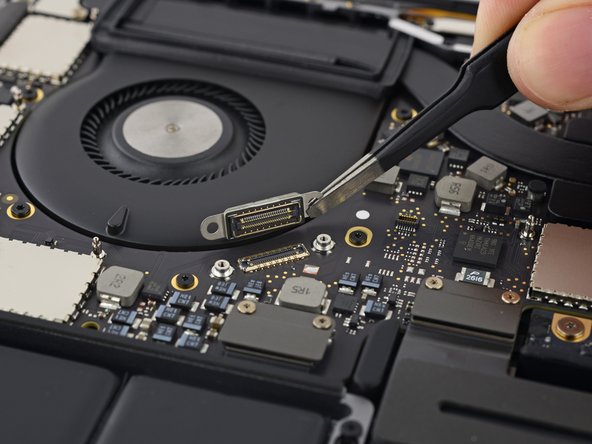
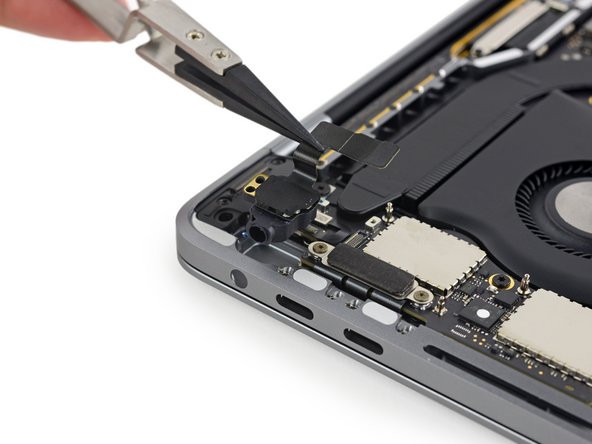
Step 6: Take Apart The Touchpad
We use a screwdriver to carefully remove the pentalobe screws on the touch panel. There are ten in total, and the touch panel can be easily disassembled. Different models of touchpads are compatible unless the cable routing is changed.
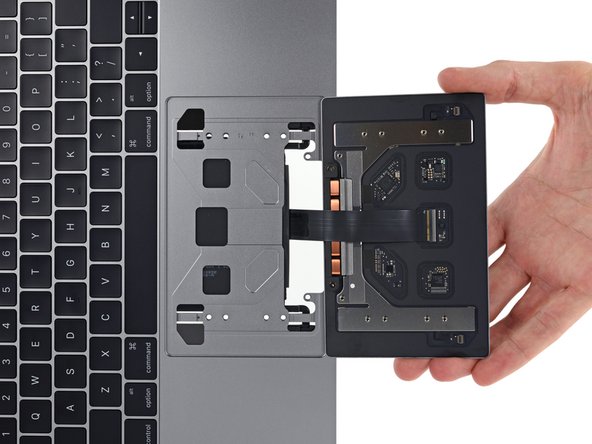
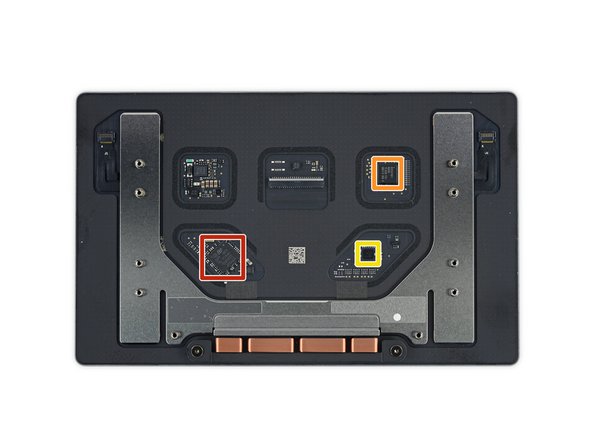
Step 7: Remove Peripheral Components
We can see that the battery, radiator and speakers of this laptop are all arranged neatly and symmetrically. We only need to carefully remove the cables of these components from the casing one by one. It is worth noting that the radiator is fixed to the circuit board by the screws at the bottom, so you need to carefully unscrew the screws before removing the radiator.
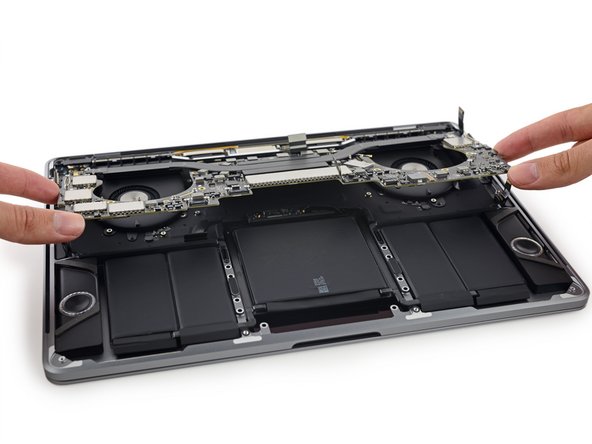
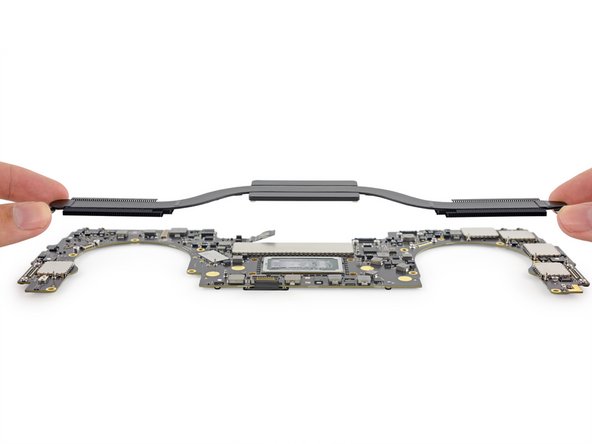
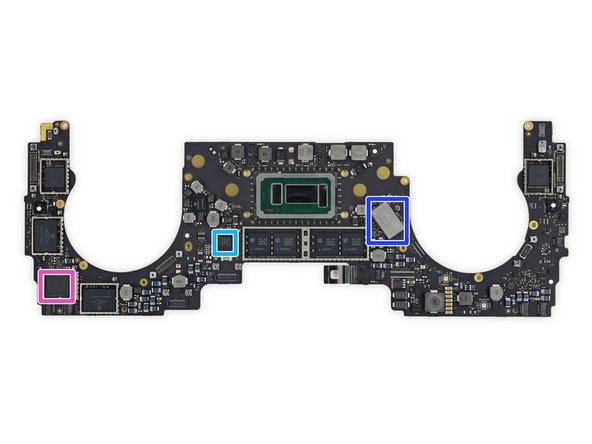
Step 8: Composition of The Curved W-shaped Logic Circuit Board
We can see this curved W-shaped circuit board that looks a bit like Chaplin’s beard. The chip on it is mainly composed of 6 components. They are: graphics processor, controller, flash disk, memory disk, Texas SMC Controller and WiFi module.
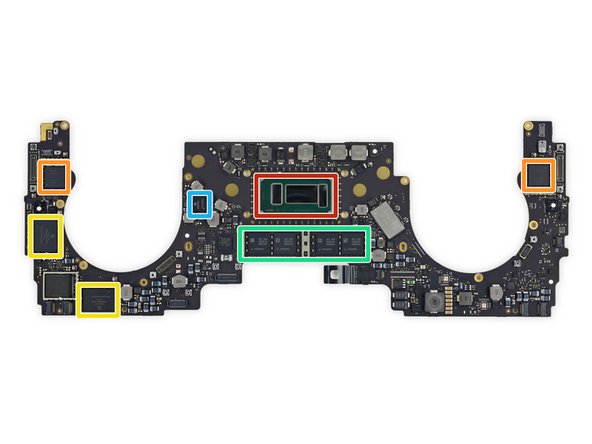
Step 9: Analysis of Components On The Back Of The Circuit Board
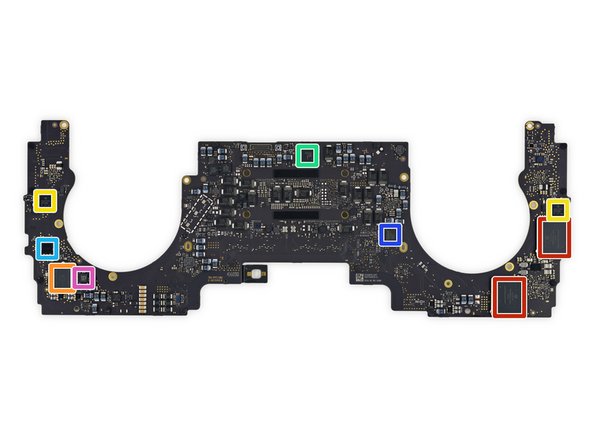
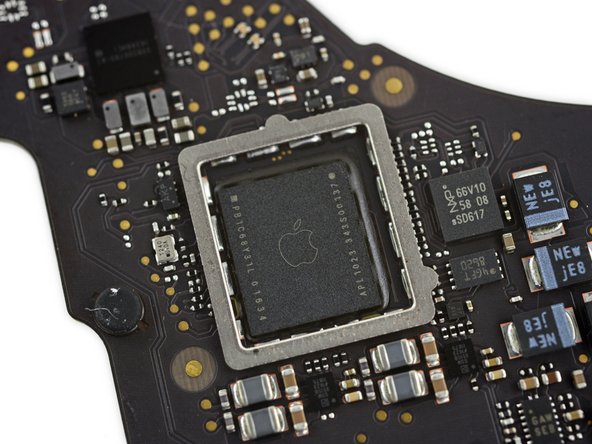
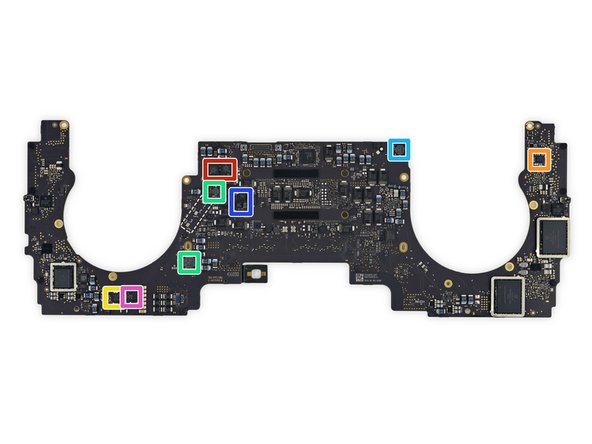
We flipped the W-shaped circuit board over and saw that there are many components on the back. The most important one is of course the core M2 chip of Apple computers. The thing that appreciates Apple is their self-developed chips, which are unmatched by other computers. Many consumers not only rely on Apple laptops for their high-value appearance made of aviation aluminum, but also because they have core algorithm chips that allow consumers to have an extremely smooth and silky gaming and office experience!
Step 10: Disassemble The Fingerprint Reader
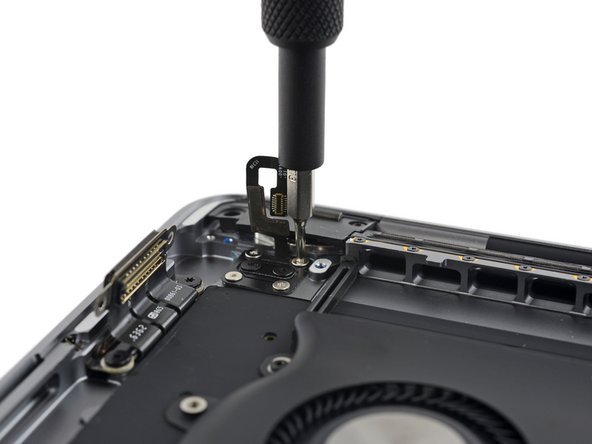
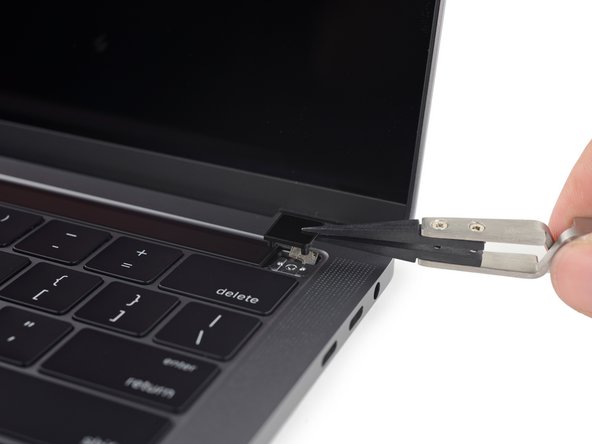
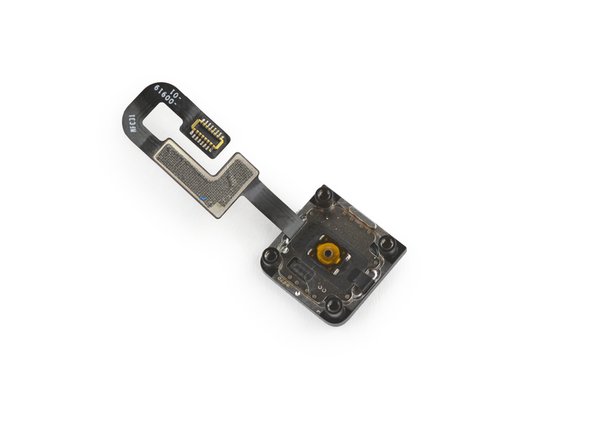
We know very well that the MacBook Pro 13 is the first laptop device with a fingerprint reader. This power button, which is usually just a power switch button, has fingerprint recognition technology and is covered with sapphire crystal, which makes the fingerprint reader durable, more scratch-resistant.
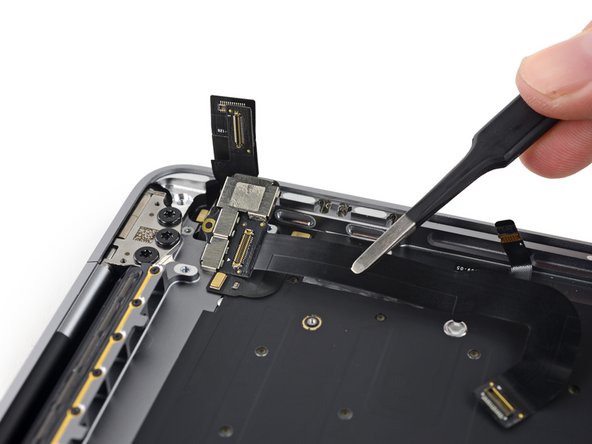
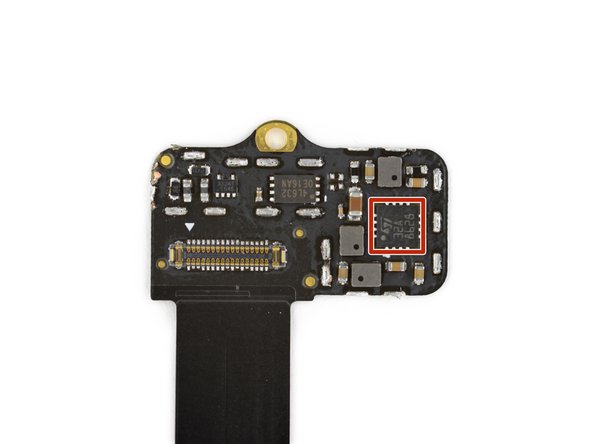
Step 11: Remove The USB-C Circuit Board
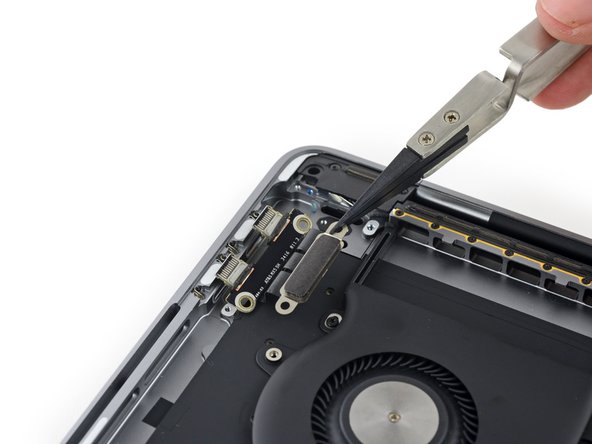
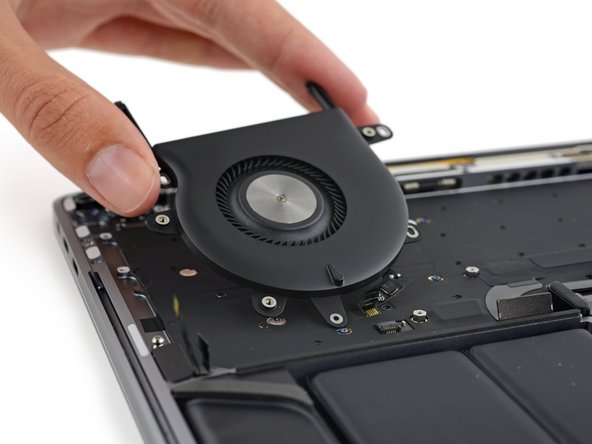
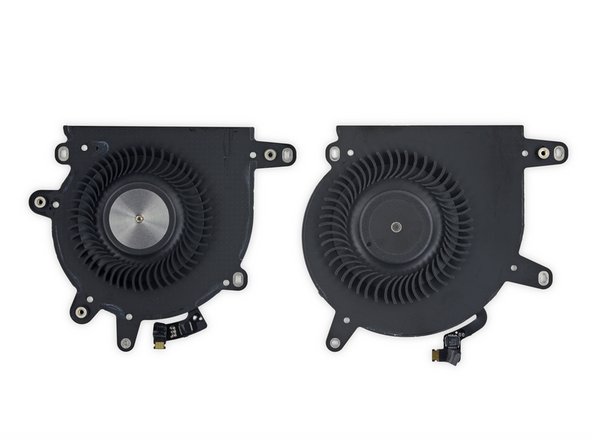
We know very well that Apple’s products in the past were equipped with MagSafe magnetic interfaces, but this one did not use it. Instead, it used two USB-C modules with the same structure and a symmetrical structure design. After dismantling it here, we can finally take out the two fans on both sides. We have been waiting for a long time!
Step 12: Keyboard Case Analysis
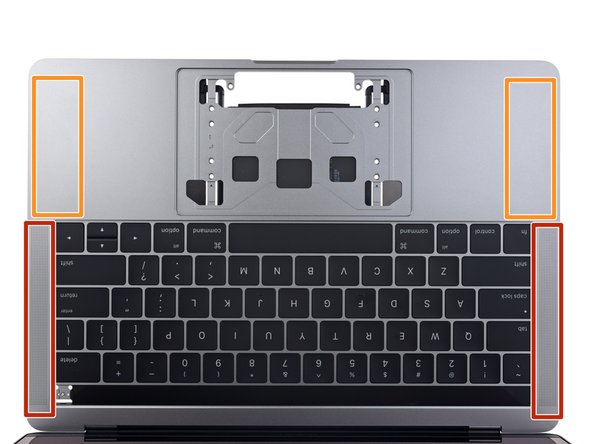
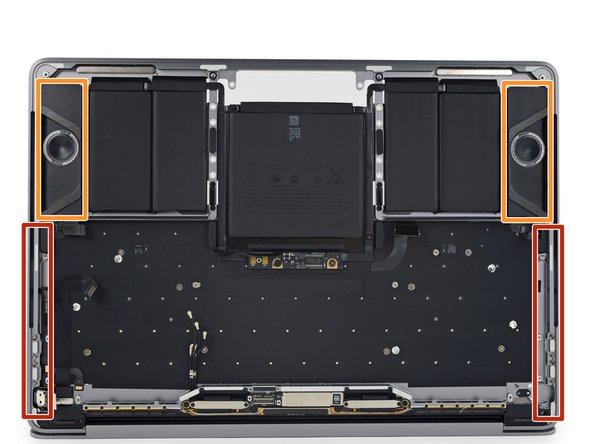
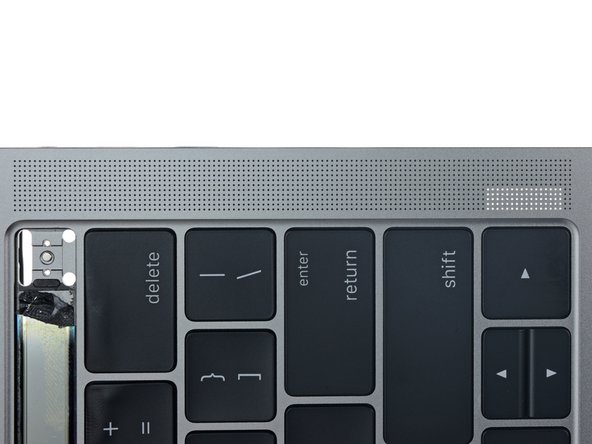
We can see that there are grid-shaped sound exhaust holes on both sides of the disassembled keyboard shell, but when we connected the internal speakers, we found that the position of the speakers did not match the position of the grid-shaped sound exhaust holes. I guess this design It is very likely that it is just for decorative effect, or it may be a design created by the Apple brand to unify the product line. Who knows?
Step 13: Remove the Speaker
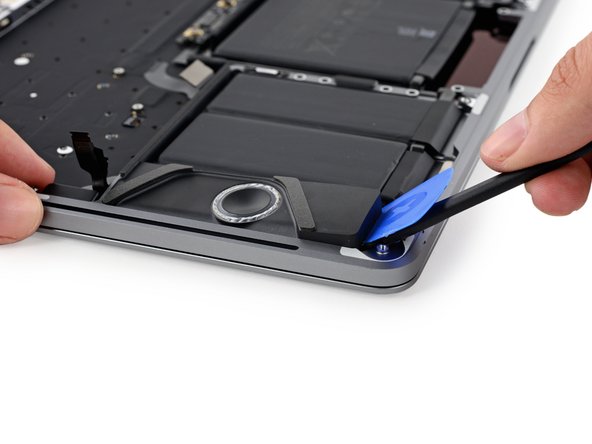
Different from other versions of speaker fixing methods, MacBook Pro 13 abandons the original way of fixing the speakers with rubber-buffered soundproof screws, and instead uses glue to directly bond them. This requires us to prepare a pick and a pry bar, carefully use a hot air blower to blow open the glue, and carefully pry out the speakers on both sides.
Step 14: Disassemble The Touch Bar Display Screen
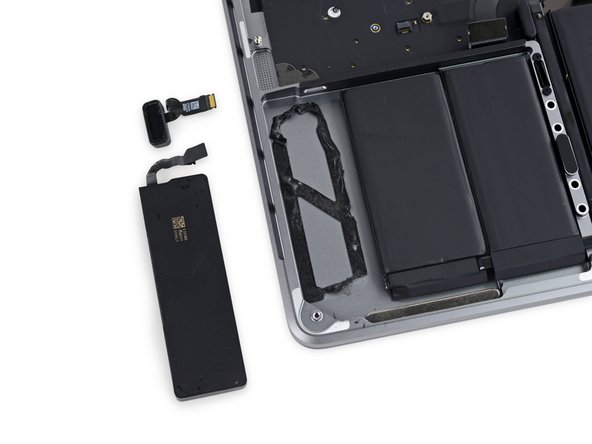
After unplugging the connection cable of the Touch Bar display from the bottom, use a P2-sized pentalobe torx knife to unscrew the screws that fix the Touch Bar. This way, you can easily remove the core component that distinguishes this MacBook from other products!
Step 15: Disassemble The Battery
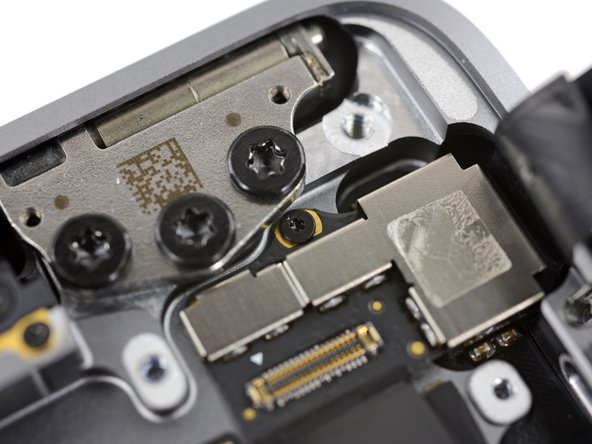
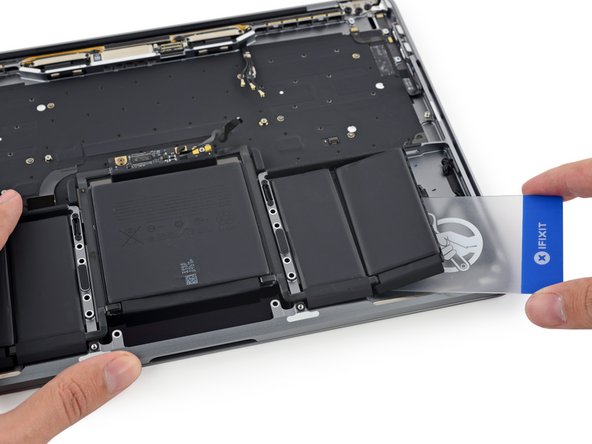
It is always very laborious to disassemble the parts with strong glue to fix them. You need to pay attention to the effect of the temperature of the hot air blower on the battery to avoid damaging the battery due to excessive temperature. Finally, after 45 minutes of blowing, prying, and prying efforts, we were able to safely remove the five series-connected batteries.
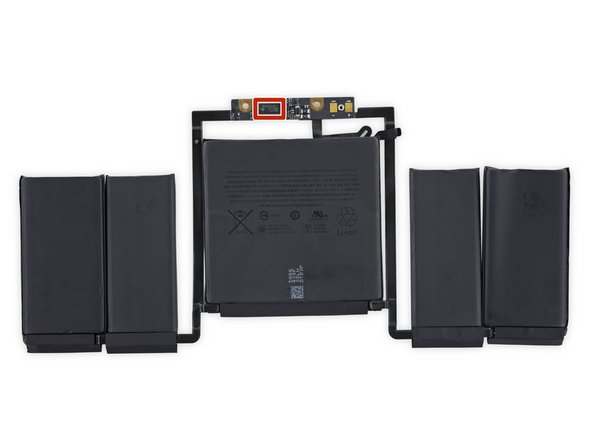
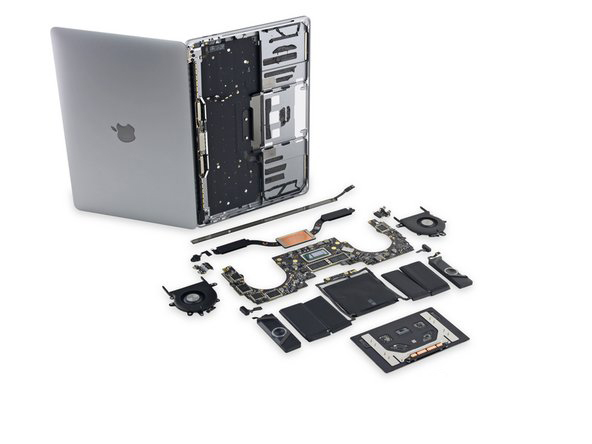
You can take a look at the full disassembled picture. It’s amazing. This is the most interesting project in the world. We can easily disassemble and repair our MacBook Pro 13 with Touch Bar at home. Friends, please take it apart and experience it!
